
Form
Striving for a slimmer more compact solution was important to achieving our goals. Many of the designs' forms grew from the material properties we envisioned manufacturing them with, such as using polished cast acrylic instead of glass.
Function
While some concepts embraced the idea of dual function and embedding the lens element into another tool, or using multiple lens elements, our design constraints for fewer parts, led us to a single function yet pure design that could be used in everyday life. Furthermore, by not targeting those requiring high levels of precision and clarity, we embraced the flexibility and thinner profile that a fresnel lens provides.

Prototyping
Our early models focused on how we could hold a magnifying element with both fresnel and biconvex lenses. Fresnel technology allowed us to experiment with rectilinear shapes while traditional optics limited us to circular profiles.
The materials used included, acrylic sheets, foam-core, and lasercut plywood.
Refining
After a several rounds of refining and prototyping, we settled on a rectangular form that could be held both vertically and horizontally with side grips co-molded into the remarkably thin lens itself. This design allowed us to reduce the weight by over 90%, estimated manufacturing cost by over 75% and part count from 9 to 2 co-molded parts made from silicone cast around the acrylic lens.

Surfacing
To achieve a desirable surface finish on the grip, we tested how silicone would cure on different textured surfaces. Sandblasted acrylic yielded the most pleasing finish and so the master from which we would create the mold featured this treatment. It also featured an embossed vinyl cut "x3" which would then become debossed magnification indicator in the final product.
MANUFACTURING PROCESS
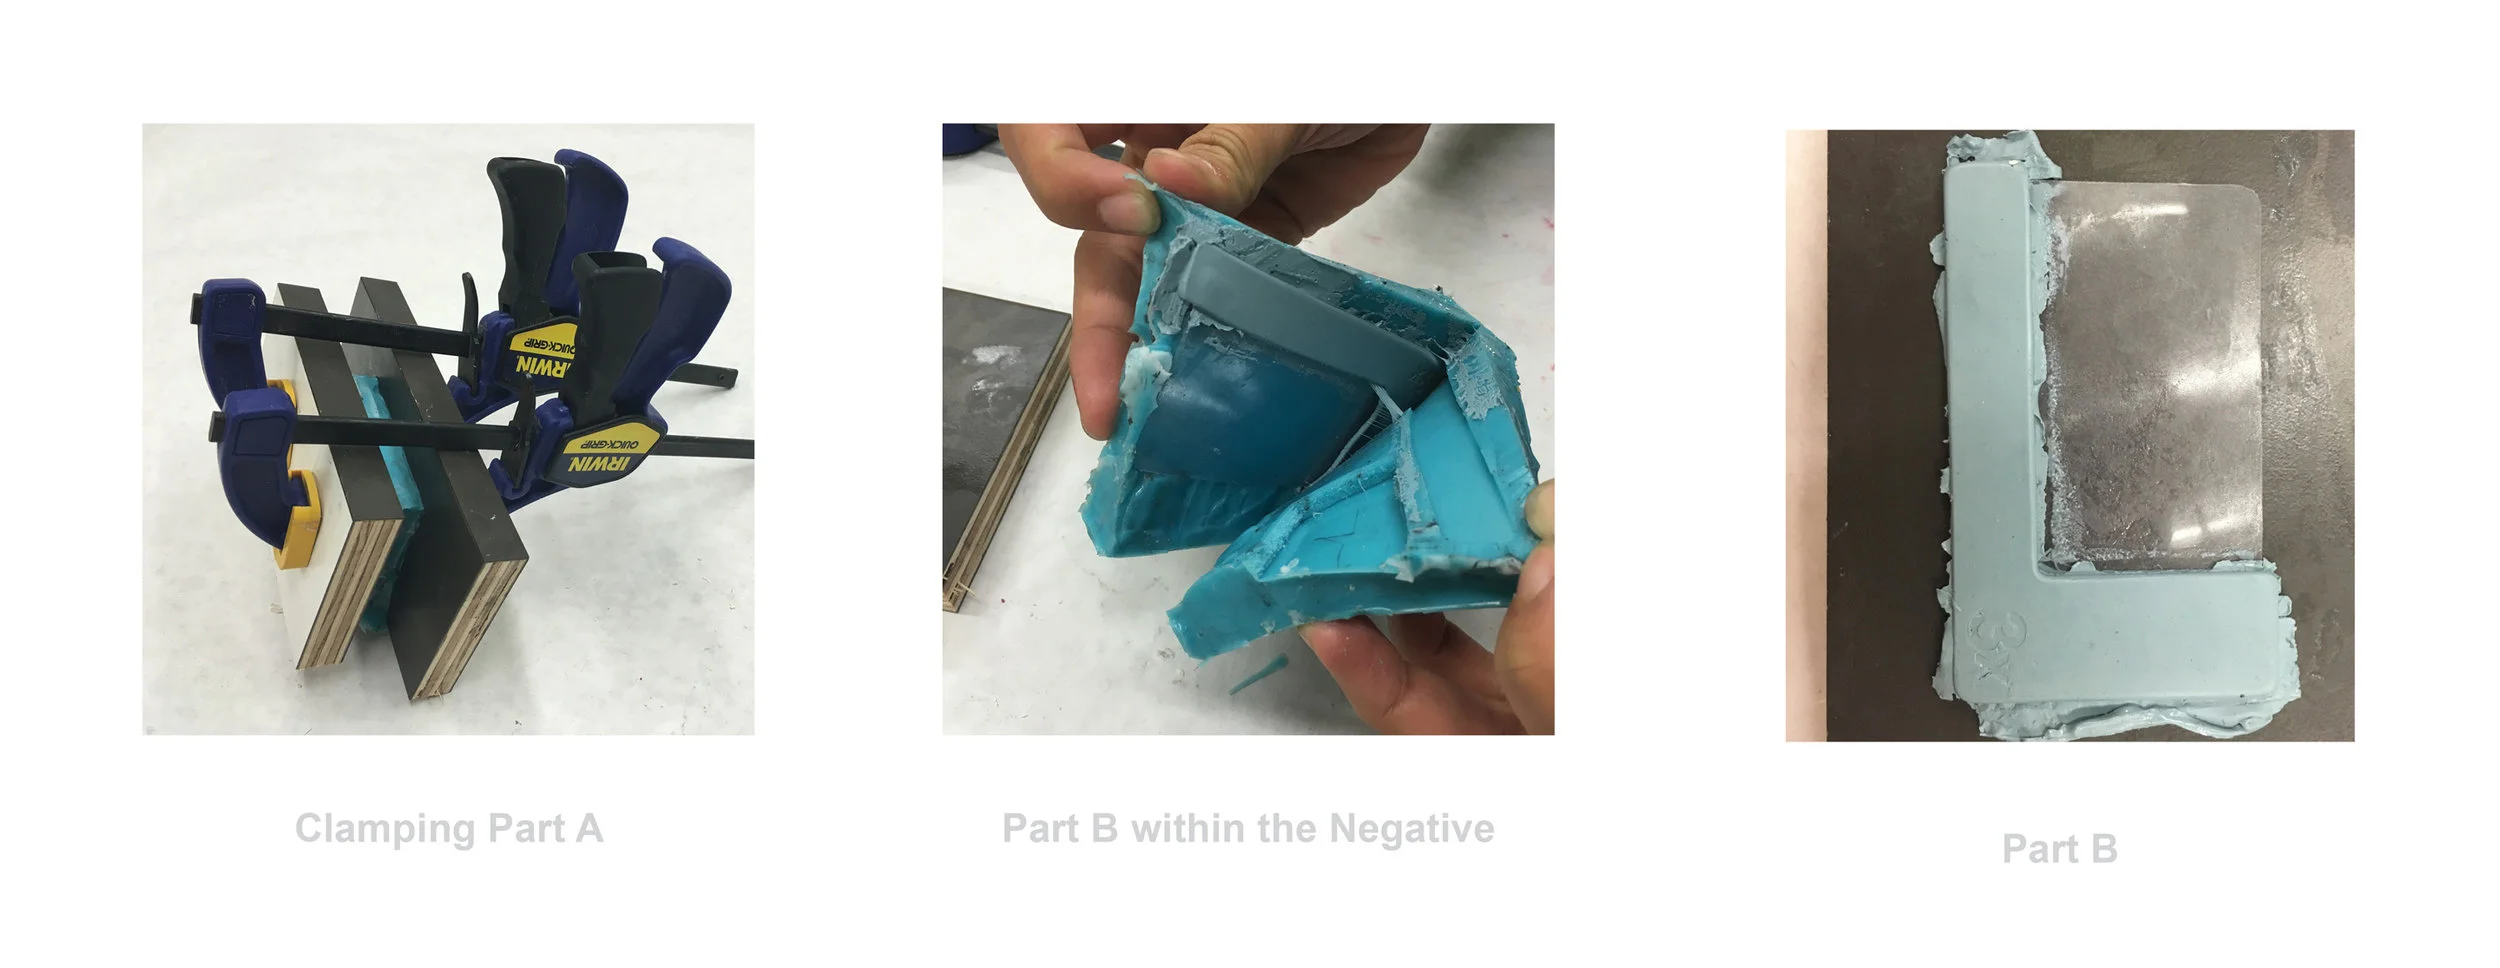
Make a sealed foam-core container for PART A
Mix silicone for the mold and fill the container with PART A inside
When cured carefully remove PART A from the mold
Clean up edges and spray mold release
Mix OOMO 25 or Dragon Fix 30 and pour it into the negative cavity
Carefully place the lens within the mold and pop bubbles as they rise
Clamp mold closed and wait for PART B to cure
Remove PART B and clean up the edges with precision